
-
Cangzhou Yulong Steel Co., Ltd.
-
Phone:
+86 13303177267 -
Email:
admin@ylsteelfittings.com


- English
- Arabic
- Italian
- Spanish
- Portuguese
- German
- kazakh
- Persian
- Greek
- French
- Russian
- Polish
- Thai
- Indonesian
- Vietnamese
- Zulu
- Korean
- Uzbek
- Hindi
- Serbian
- Malay
- Ukrainian
- Gujarati
- Haitian Creole
- hausa
- hawaiian
- Hebrew
- Miao
- Hungarian
- Icelandic
- igbo
- irish
- Japanese
- Javanese
- Kannada
- Khmer
- Rwandese
- Afrikaans
- Albanian
- Amharic
- Armenian
- Azerbaijani
- Basque
- Belarusian
- Bengali
- Bosnian
- Bulgarian
- Catalan
- Cebuano
- China
- China (Taiwan)
- Corsican
- Croatian
- Czech
- Danish
- Esperanto
- Estonian
- Finnish
- Frisian
- Galician
- Georgian
- Kurdish
- Kyrgyz
- Lao
- Latin
- Latvian
- Lithuanian
- Luxembourgish
- Macedonian
- Malgashi
- Malayalam
- Maltese
- Maori
- Marathi
- Mongolian
- Myanmar
- Nepali
- Norwegian
- Norwegian
- Occitan
- Pashto
- Dutch
- Punjabi
- Romanian
- Samoan
- Scottish Gaelic
- Sesotho
- Shona
- Sindhi
- Sinhala
- Slovak
- Slovenian
- Somali
- Sundanese
- Swahili
- Swedish
- Tagalog
- Tajik
- Tamil
- Tatar
- Telugu
- Turkish
- Turkmen
- Urdu
- Uighur
- Welsh
- Bantu
- Yiddish
- Yoruba

Feb . 15, 2025 08:07 Back to list
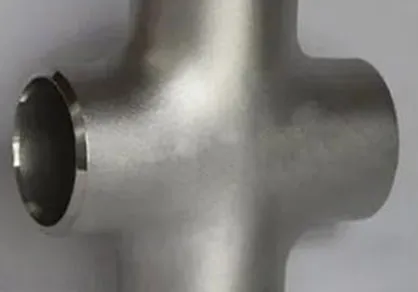
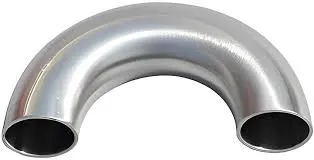
TPEP STEEL PIPE
Repairing galvanized pipes is an essential skill for homeowners and DIY enthusiasts facing plumbing issues. Galvanized steel pipes, widely used before the 1960s, often fall victim to corrosion over time, leading to leaks and debilitating water flow. This guide illuminates practical, expert-approved strategies for repairing galvanized pipes, ensuring the information is accurate, authoritative, and trustworthy.
Once the preparation is complete, it’s time to replace the removed section. Utilize the threading machine to ensure the new connections match securely with the existing pipe system. Once threaded, apply pipe compound or Teflon tape to the new threaded ends; this creates a watertight seal, reducing the risk of future leaks. Attach the new section using appropriate fittings, ensuring each joint is securely fastened with a pipe wrench. The snug fit reduces the likelihood of leaks and enhances the longevity of the repair. An old pro tip make sure not to over-tighten, as this may lead to hairline cracks in weaker sections of the pipe. After completing the repair, it's crucial to test your handiwork. Gradually turn the water supply back on, inspecting closely for leaks at the newly repaired sections. Maintain vigilance for a short while to ensure pressure holds and no slow leaks develop. In conclusion, while galvanized pipes are prone to corrosion, a methodical approach to repairs can significantly extend their lifespan, safeguarding household water systems. This procedure underscores expertise in home maintenance, ensuring a safe, reliable water supply. For anyone less inclined toward DIY repairs, consulting a professional plumber is advisable, underscoring the importance of expert guidance in safeguarding plumbing infrastructure. Through these repairs, one not only addresses the immediate problem but learns invaluable skills for future home maintenance. By prioritizing experience, authority, and trustworthiness in our approach, we ensure longevity and reliability in galvanized pipe systems. This guide forms a comprehensive resource aimed at delivering sustainable solutions to common plumbing challenges faced by many today.
Once the preparation is complete, it’s time to replace the removed section. Utilize the threading machine to ensure the new connections match securely with the existing pipe system. Once threaded, apply pipe compound or Teflon tape to the new threaded ends; this creates a watertight seal, reducing the risk of future leaks. Attach the new section using appropriate fittings, ensuring each joint is securely fastened with a pipe wrench. The snug fit reduces the likelihood of leaks and enhances the longevity of the repair. An old pro tip make sure not to over-tighten, as this may lead to hairline cracks in weaker sections of the pipe. After completing the repair, it's crucial to test your handiwork. Gradually turn the water supply back on, inspecting closely for leaks at the newly repaired sections. Maintain vigilance for a short while to ensure pressure holds and no slow leaks develop. In conclusion, while galvanized pipes are prone to corrosion, a methodical approach to repairs can significantly extend their lifespan, safeguarding household water systems. This procedure underscores expertise in home maintenance, ensuring a safe, reliable water supply. For anyone less inclined toward DIY repairs, consulting a professional plumber is advisable, underscoring the importance of expert guidance in safeguarding plumbing infrastructure. Through these repairs, one not only addresses the immediate problem but learns invaluable skills for future home maintenance. By prioritizing experience, authority, and trustworthiness in our approach, we ensure longevity and reliability in galvanized pipe systems. This guide forms a comprehensive resource aimed at delivering sustainable solutions to common plumbing challenges faced by many today.
Next:
Latest news
-
ANSI 150P SS304 SO FLANGE
NewsFeb.14,2025
-
ASTM A333GR6 STEEL PIPE
NewsJan.20,2025
-
ANSI B16.5 WELDING NECK FLANGE
NewsJan.15,2026
-
ANSI B16.5 SLIP-ON FLANGE
NewsApr.19,2024
-
SABS 1123 FLANGE
NewsJan.15,2025
-
DIN86044 PLATE FLANGE
NewsApr.19,2024
-
DIN2527 BLIND FLANGE
NewsApr.12,2024
-
JIS B2311 Butt-Welding Fittings LR/SR 45°/90° /180°Seamless/Weld
NewsApr.23,2024


